Sunday, April 28, 2013

Spring Cleaning Part 2

I'm still really enjoying my homemade dishwasher detergent cubes I talked about here, so I figured I'd continue the trend and make my own household cleaners using some green cleaning recipes I've seen on Pinterest.

The first set of recipes came from this pin which is from heandsheeatclean.com. I used their recipes for window cleaner, all-purpose cleaner, and dusting spray. I also used a recipe from justusgirls.com for a super simple tub and shower cleaner which can be found here. All of the ingredients are simple and cheap.


Here are all the recipes I used listed out:

Window Cleaner

1/4 cup rubbing alcohol
1/4 cup white vinegar
1 tablespoon cornstarch
2 cups of warm water

All-Purpose Cleaner

2 teaspoons baking soda
1/2 teaspoon Dawn dish soap
4 tablespoons white vinegar
400 milliliters warm water (about 13 oz)

Dusting Spray

2 teaspoons olive oil
1 teaspoon lemon juice
1/4 cup white vinegar
1 cup warm water

Tub Cleaner

12 oz Dawn dish soap
12 oz vinegar

I purchased some 24 ounce spray bottles from Wal-Mart to put all of the cleaning products in. All recipes say to put the ingredients in a spray bottle and shake well to mix them up. The tub cleaner recipe says to heat the vinegar up in the microwave for about 1 1/2 minutes until it's hot and then mix it with the Dawn. I wrote the cleaner type and recipe on the outside of each bottle in Sharpie so I could duplicate them easily when they run out.

For the 24 ounce bottles, I doubled the dusting spray recipe in order to fill up the bottle. The all-purpose cleanser bubbles and "erupts" when you mix the vinegar and baking soda, so add the ingredients together a little at a time to avoid a mess. I used a funnel to get everything in the bottles and it worked really well.

I'm really excited about these cleaners - they're simple and easy to make, don't include a bunch of weird ingredients that you can't pronounce, and they're cheaper than their store-bought counterparts. I'm looking forward to trying them out!


Friday, April 26, 2013

Free Printables!

A few years ago I ordered some photo prints online with Snapfish and got on their mailing list. I almost always just delete the e-mails I get from them, but today I actually read one and I'm glad I did - they have a lot of cute FREE printables on their website!

The ones in the e-mail I received today were for Mother's Day which is right around the corner, but they've got lots of others for every holiday, announcements, cards, etc.

The main page with links to all of the printables is located here.

Here are some I thought were cute -

Personalized grandma card


Bridal shower invite


Baby shower invite

They have some awesome printable birthday party kits with cupcake wrappers, decorations, invites, and all sorts of other neat stuff sorted by theme, and some really cute "Made by me for Mom" and "Made by me for Grandma" printable cards for Mother's Day.

And I am not affiliated with this site or being paid to say that this stuff is cute - I just think it's neat! So go check it out and print some free stuff!

Tuesday, April 23, 2013

Spring Cleaning Part 1

Spring is here (finally)! It's sunny and warm in Pennsylvania, the flowers are blooming, the grass is green - and it's time to start thinking about spring cleaning.

I've seen a lot of "green cleaning" pins on Pinterest lately, and while I'm not a control freak when it comes to what ingredients are in my cleaners, I do like to save some money when I can and a lot of the recipes being pinned use really simple (and cheap) ingredients that pinners rave about. So, I figured I'd give it a try!

I've found several recipes for all-purpose cleaner, window/mirror cleaner, furniture polish, and bathroom cleaner but I haven't gotten any spray bottles yet so those will have to wait a little while. This week I focused on dishwasher detergent.

I started with this recipe for homemade dishwasher detergent cubes. My grandma got me started on Cascade Complete dishwasher packs a while back and they work really well, but those little things are dang expensive! I knew there had to be a better way :-) This recipe is really simple and I was able to find all of the ingredients in one place. The ingredients and amounts are:

1 cup borax
1 cup washing soda
1/4 cup epsom salt
lemon juice
plastic ice cube trays

Louise says to mix the borax, washing soda, and epsom salt together in a bowl until well combined. Then, scoop out one cup of the blended mixture into a separate bowl and add 4 tablespoons of lemon juice to it. The mixture will fizz while you stir it, and then it turns into a paste. Take the paste and press it down into your ice cube trays. Just repeat that process until you're out of powder, then let the ice cube trays sit for a few hours while the paste dries out. Once it's dry, just pop the cubes out of the trays and they're ready to use! This picture is from Louise's blog - mine looked the same.


So far they're working very well for me! They even got all of oil out of some empty sugar scrub jars I washed so they're good in my book :-)

Our apartment is so small that it really doesn't take very long to clean, but I got a surprise while vacuuming this last time! My dog Axel has short, fine hair that blends pretty well with most anything so it doesn't stand out. Don't get me wrong, he sheds and you can see it but it's just mildly noticeable and easily cleaned up. This is my first time experiencing "the Spring shed" with Joe's dog Tank who has long black hair that gets ALL OVER EVERYTHING (those of you with labs, you know what I mean) and he has that soft fluffy undercoat that comes out when the cold weather goes away. 

So, Tank has to stay in a crate during the day because he's a spoiled brat "handful" and gets into things while we're gone. We cover the crate with a sheet because he's scared of EVERYTHING and likes to hide in there, so we can't really see the bottom of said crate very often. Axel used to have to be in a crate when he was younger and I never had an issue with it getting overly hairy, so I haven't really paid Tank's crate as much attention as I should have, apparently. While vacuuming the apartment, I decided to move his crate so I could vacuum the carpet underneath. I was greeted by this disgusting mess:


This picture really doesn't do it justice - it looked so much more hideous in person! I'm pretty sure I shrieked and made a face something like this:


At first I thought Tank had defied all laws of nature and given birth to hairy black puppies behind his crate, but luckily it was just the largest collection of hair off of an animal I've ever seen. Needless to say, now that I know he's hoarding enough hair to make 100 toupees for Donald Trump behind his crate, I will be moving it every time I vacuum.

YUCK!!!!!!!!

I have officially joined the "I own a fuzzy dark-haired shedding machine" club. I guess this was the initiation ceremony?

Happy cleaning everyone!

Saturday, April 20, 2013

Baby Shower

I was so looking forward to going to Detroit and Tulsa/OKC this weekend to help host Joe's sister-in-law's baby shower and to see friends and family in Oklahoma, but alas it wasn't in the stars for me. Our dogs' bordatella vaccines ran out during our move to Pennsylvania and we just got them updated at the beginning of this week. Turns out (unlike in Oklahoma) Pennsylvania kennels WILL NOT ACCEPT dogs whose vaccines have been given within two weeks of their scheduled boarding time. No exceptions. We'd never had problems with that in Oklahoma so we naively thought it wouldn't be a problem. So, I'm now babysitting the two little stinkers and rather than showing lots of cute pics from the baby shower I'll just have to settle for sharing pictures of the baby shower prize bag goodies and presents for Angela and Chris that I made.

Luckily, Joe sent me some pictures of the shower so I have a few at least :-) The flower arrangements are especially impressive!


I decided to make all of the gifts for Chris and Angela, and luckily I got started on those early because some of them took a while! Lucky for me, it all fit inside of Joe's suitcase :-)

Sundresses and ruffled diaper cover
Baby headbands

Crochet baby blankets

Crochet baby orchid sandals

Daddy Doody Kit


For anyone who wants to try their hand at making these for a gift or for your own kiddos, here's the skinny on where I got all of the info to make everything:

Crochet blankets - I used this pattern for the scalloped edges, but for the main part of the blankets I used an alternating single crochet and half double crochet stitch (one row SC, next row HDC) using a size P hook and two strands of yarn. The smaller blanket measures about 34 inches across and the larger one is about 40 inches.

Crochet baby orchid sandals - I used this pattern but instead of using a snap for the closure, I used sewable velcro so the size could be adjusted. Just a forewarning, these take some time to do (that's an understatement, they're very involved. But very cute!)

Sundress and ruffled diaper cover - I used this tutorial for the diaper cover and this tutorial for the dresses.

Headbands - I purchased the supplies for the thicker ones at Hobby Lobby, and got all of the supplies for the skinny ones from this site. They even have an awesome tutorial that shows you exactly what you need and how to put it together here.

Daddy Doody Kit - Don't forget Dad at the shower! I used this post for instructions.

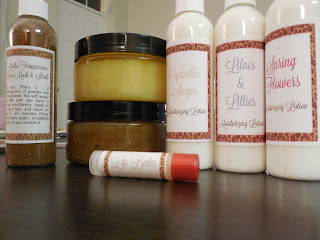
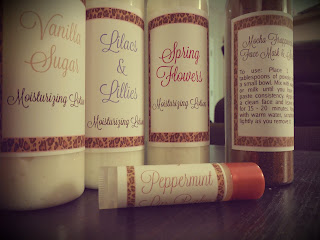
And I finished the baby shower prize gifts just in time to send them off with Joe - I was worried the oil from the scrubs would leak but I used a tip from thesage.com and added some beeswax to them to help thicken them up before their flight. Apparently it worked, Joe said they got there in once piece!


Sorry I won't get to see my family and friends in Oklahoma this time around, but I'm hoping to make a trip down some time in May to say hello :-)

Monday, April 15, 2013

Big News!

So as most of you probably already know, Joe proposed yesterday! We had a wonderful night celebrating our one year anniversary. Joe surprised me by taking me downtown for dinner - we started out by riding the Duquesne Incline up Mount Washington. The Duquesne Incline was built in 1877 and has a working museum at the top of the mountain where you can learn the history of the incline and see its working parts. Very neat for a history fanatic like me :-)


Then we walked up the hill to Point of View Park, the site of the "Point of View" statue sculpted by James West. It depicts George Washington and Seneca leader Guyasuta in the year 1770 meeting somewhere near the confluence of the Allegheny and Monongahela rivers after fighting on opposing sides of the French and Indian War. We walked along a trail to the outlook area overlooking the west end of downtown, and that's where Joe gave me my ring!


Then we had dinner at the Grandview Saloon at the top of Mount Washington. We had a great view of downtown during dinner!


I even got some beautiful roses at home AND tulips and more roses at work. I'd say I made out pretty well!


I gave Joe some hard-to-find 16 1/2 37 Tall mens' dress shirts and some metal collar stays that were stamped to say "You are my favorite". The collar stays were purchased on Etsy here.


Joe liked his presents, but I think he won the gift-giving prize this time :-)

Saturday, April 13, 2013

DIY Mineral Makeup


I am SO EXCITED about this! I talked about coming across a DIY mineral makeup kit here and I just got my mortar and pestle in last night, so I tried my hand at cosmetic making. This stuff is everything I thought it would be and more! I am so excited about the prospect of not ever having to pay $30 for one jar of store-bought mineral makeup ever again.

To recap my last post, I came across a makeup kit called "Pure & Natural Makeup Kit" on MakingCosmetics.com. It comes in seven different colors and includes the mineral foundation base, pigment mix, powder container with closable sifter, kabuki brush, instruction card, and a spatula for moving the finished powder to your container. Here's what it looked like when I received mine:


I also ordered a second pigment mix for my mom because her skin is a little more "beige-y" than mine, and I purchased a powder container for her. As I mentioned in my last post, the website says that the kit produces around 58 grams of powder, and each Bare Minerals powder container holds 6 grams of product, so that should be enough to fill almost 10 powder containers. Here's the price break-down of what I ordered:

Pure & Natural Makeup Kit - $39.20
Bare Beige Pigment (for mom) - $10.10
Powder Container - $1.60

Total - $50.90

Before I purchased everything, I looked on retailmenot.com for a coupon code. I found one that gives you a free book called "Recipes for Color Cosmetics" with your first order of $50.00 or more. I qualified, so I used it! The code is "FIRSTORDER". The book is really neat, it has a ton of recipes for lipstick, mineral makeup, blush, lip gloss, eye shadow, anything you can think of. Shipping for everything was $14.32, so all-together my final cost was $65.22. Given that you can make 10 containers worth of product and most store-bought products cost this much for two, I'd say it's a good deal.

The last thing you need is a mortar and pestle to mix the base and pigment together. I ordered this one from Amazon for $8.26 and I have a Prime account, so shipping was free. You can also order the same kit from Amazon, but it's cheaper to order it directly from the makingcosmetics.com website.

So it turns out I'm glad I ordered the extra pigment for my mom at the same time because I ended up using it for me! Like I said, they only have 7 shades of pigment on the website and since most commercial brands include a ton of different color options, it's not a bad idea to pick two colors and plan on mixing them to get the right shade. I wear Golden Fair by Bare Minerals, and I ordered the kit in "Natural Buff" which is their lightest shade and purchased "Bare Beige" for my mom. Since the Natural Buff doesn't have much yellow in it, I mixed in some bare beige to make it as close to Golden Fair as possible. 

The instructions for this are pretty simple - you put two tablespoons of base powder and 1 1/2 teaspoons of pigment powder into the mortar and then mix it up until it's well blended. The instructions say if it's too light, mix in more pigment until it's the right shade. If it's too dark, mix in more of the base to lighten it up. As I said, I ended up using both Natural Buff and Bare Beige to mix mine and I love the way it came out.

Here's some of the powder after it had been thoroughly mixed in the mortar:


In addition to the 1 1/2 teaspoons of pigment the original recipe calls for,  I ended up adding and additional 1 1/2 teaspoons of pigment to get the shade I wanted. With this much powder, I was able to fill the powder container that came with the kit and fill up an extra Bare Minerals container that I kept after I used up all of the powder. You can open these by taking a pair of tweezers or small scissors to the bottom of the container and popping off the bottom piece. I googled "how to open Bare Minerals container" and there were a ton of YouTube videos and articles on how to do it.


Old Bare Minerals container on the left, Makingcosmetics.com container on the right

And that's it! Once the colors have been mixed thoroughly, use the spatula to move the product into your container(s) and you're done. I tried the makeup out this morning and I love it - same look and feel as store-bought mineral makeup. I'll definitely be using this and recommending it in the future. 

Happy makeup making!

Wednesday, April 10, 2013

Projects + House Update

So the other day I got this idea that someone out there smarter than me had probably come up with some sort of recipe or alternative for Bare Minerals that didn't cost an arm and a leg. I started googling, and came across an article someone wrote about all of the various ingredients that are required to make your own mineral makeup and that they purchased them on Amazon. Luckily, they also mentioned that you can buy a pre-made kit on Amazon as well if you aren't interested in buying tons of bulk minerals. I decided to check it out, and being someone who's always looking for a deal, I googled the name of the kit to see if anyone had it cheaper. Turns out, the company who makes it has their own website and they sell it cheaper there. Yay!

The kit is called "Pure & Natural Makeup Kit" and is sold at makingcosmetics.com. You can find it here.

The kit comes with a makeup brush, powder container (with sifter that you can close!), pigment powder, mineral powder, and a scooping stick. After shipping, the kit costs about $50.00 and the description notes that you can make about 58 grams of powder foundation with it. I checked online, and each Bare Minerals container holds about 6 grams, so you can make almost 10 containers worth of foundation for a much cheaper price. Yippee! I read the reviews and they were good - people noted that the foundation was just what they expected and very reasonably priced. I just got the kit in today and I'm really excited to try it out! I ordered a mortar and pestle to crush the minerals with on Amazon for $8.00 and I'm still waiting for that to arrive, but I'll be sure to post my results as soon as I'm able to mix up my first batch :-)

Here's what the contents of the kit look like:


I also ordered some lip balm labels for some homemade peppermint lip balm I made for the baby shower, and I just printed them off. They look so good and they work much better than the regular matte label paper I tried using a few weeks ago. I bought the labels from bulkapothecary.com - they're only a dollar per sheet (no minimum order) and you can use them on an inkjet printer! You can find them here

Here's how the lip balm tubes came out - I love them!


Bulkapothecary.com is AWESOME - I ordered a bunch of jars and bottles to hold scrubs, lotions, etc that I'd like to make for holiday or birthday gifts and their prices are really reasonable. I should be getting my stuff in soon, so I'll be busy making lots of homemade goodies!

We also got good news on both housing fronts. Our house in Tulsa is moving forward with the contract that has been put on it, and the relocation company that will be purchasing it from us and selling it to the new buyers has accepted the offer that was put on it, so we will be traveling back to Oklahoma this month to get everything moved out and then we'll be able to wash our hands of it! Woo hoo! And, we found out that our new house here should officially go under construction on May 1st, and we'll have our pre-construction meeting on April 29th. I'm so ready for it to start being built!

And, the weather is FINALLY warm here in Pittsburgh... I think we are officially done with winter. Thank goodness :-)


Thursday, April 4, 2013

Pin Testing - Mocha Frappuccino Face Mask/Scrub


I got my supplies in yesterday to make the facial mask and scrub for the baby shower, so here's my take on the original!

Mocha Frappuccino Face Mask/Scrub from Crunchy Betty - original post here

4 Tbsp organic ground coffee
3 Tbsp cocoa powder
1 Tbsp powdered honey granules - purchased from Amazon
1 Tbsp full fat powdered milk (original recipe calls for goat's milk, but I used regular) - purchased from Amazon


I purchased Boston Round 8 oz PET size 24 plastic bottles from Majestic Mountain Sage - they're $6.00 for a pack of ten and can be purchased here. I found that in order to fill one, I needed to double the recipe.

Start by mixing all ingredients in a bowl and stir to combine. This smells heavenly!


Now, the hard part - getting it into the containers. I haven't gotten a funnel for the apartment yet and BOY would it have come in handy! I was finally able to make a paper funnel using a small piece of paper, but I would highly recommend using a regular funnel for this part. Just scoop the mixture into the bottle and voila!


One package of organic coffee (Wally World brand) filled up 6 and 1/2 of the 8 oz containers. 
I decided to try the mask since I had half of a bottle extra, so I followed the instructions from Crunchy Betty and mixed 2 tablespoons of the dry mask with water until I had a paste. Then I applied the mask and let it sit for about 20 minutes.


Looks scary, but it smells good!
Works like a charm! This is a very easy and quick (if you have a funnel) DIY project and it makes a neat gift. Try it out!


Tuesday, April 2, 2013

Pin Testing - DIY Salt and Sugar Scrubs

Joe's sister-in-law is having a baby girl this summer and Joe's mom, sister, and I are helping her family throw a baby shower later this month in Detroit. My task is to help make goodies for prizes during the shower games, and luckily I have lots of DIY gift ideas pinned on Pinterest, so I decided to try some! First up, Paula Deen's citrus salt scrub - original recipe can be found on her site here

You'll need:

1/2 cup sea salt
1/2 cup oil of choice (I used sunflower because it doesn't have a strong scent)
1/2 teaspoon lemon zest
1/2 teaspoon orange zest
container


I ordered several supplies for my DIY gift venture from Majestic Mountain Sage after seeing lots of other bloggers suggest it. It's GREAT! Check it out here. They have all sorts of goodies for making lotions, lip balms, scrubs, etc and they have some great containers too. I ordered some size 89 low profile 8 oz jars and lids for the scrub. Lids come in black and white, and the mouth of the jar measures 3.5 inches across. I put a battery next to one of the containers for size reference - I always wish sites would provide measurements on jars/containers because they always end up smaller in real life than they look in pictures!


I actually already made three jars full of this scrub the other day, but I ran out of sea salt so I had to get more to fill the remaining jars. It took a full container of sea salt from Walmart to fill three jars. The first go around I had coarse sea salt, but they didn't have any when I went back so I went with fine sea salt instead. After seeing both, I think the course salt has a better "scrub" texture if there is such a thing :-) 

I doubled the recipe for this go around, which was enough to fill one jar with a little left over for the next. First, I dumped 1 cup of sea salt into a large mixing bowl and then added the orange and lemon zest.


The recipe calls for equal amounts salt and oil, but I felt there was too much oil in this ratio. For the doubled recipe, I started with adding 1/2 cup of oil and then adding a little at a time until I achieved the consistency I wanted. Here's how mine looked when I got the amount of oil I was looking for:


Then just scoop into the jar and enjoy! This comes out a beautiful rich yellow and smells absolutely fabulous!


Here's a picture showing the visual difference between the fine and coarse salt (coarse salt is on the right).


I haven't tried using the scrub yet, but it smells great and is really easy to make. I got all of the ingredients at Walmart and making the scrub takes less than five minutes. Love those easy projects!

I also made a vanilla brown sugar body scrub from another recipe found on Pinterest. The original recipe is located here. This was equally easy and also smells fantastic! Here's a picture of the end result:


All in all, I'm very happy with the way these turned out! Tomorrow I should be getting the remaining supplies I need to make a mocha frappuccino face mask to add to the prize gift bags, and I hope it turns out as well as the scrubs did! 

Monday, April 1, 2013

Birthday Fun :-)

Thanks to everyone for all the wonderful birthday wishes, I feel very loved! I had a great 25th birthday - got lots of beautiful flowers and got to Skype with my parents (and wish Phil a happy birthday too!) and my grandma. Always good to see friendly faces! We even had some sunshine in Pittsburgh today which has been a rare occurrence so far, so that was wonderful. 

Mom and Phil sent me some beautiful roses at the new office (the receptionist was very jealous)


And then I came home to more roses from Joe and some pretty pink tulips :-)


Joe took me to Olive Garden (my favorite restaurant) for dinner and then surprised me with a chocolate cake!


Then it was time to open presents! I asked for things from Etsy this year, so Joe got me a Kindle cover and necklace that I asked for. They're really cute!


The Kindle cover can be found here and the necklace here.

Hope everyone had a great April Fools day, I sure did!